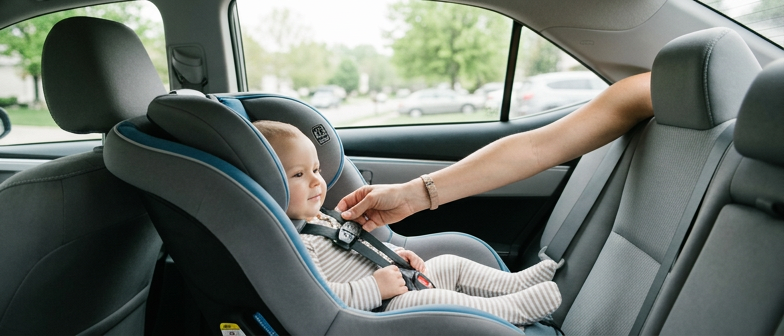
Why Safe Car Seat Adjustment Basics Matter
Understanding the basics of safe car seat adjustment matters because small details in positioning and fit affect how well safety features work in everyday travel. A child seat set at the right angle, attached to the correct anchors, and placed in a suitable seating position is more likely to work with the vehicle’s built‑in protections. Proper adjustment helps keep a child’s head, neck, and spine aligned to better manage stops, bumps, and sudden braking. For adults, a correctly set driver or passenger seat supports posture, reduces fatigue, and maintains clear access to mirrors, pedals, and seat belts, which can support safer decisions on the road.
These fundamentals are also important for travel safety preparation because families often switch vehicles, share rides, or move seats between cars, which can introduce errors when people are rushed. Knowing a few core principles makes it easier to check installation, harness routing, and seat belt use before each trip instead of relying on memory. A simple, repeatable adjustment routine encourages caregivers to notice loose straps, twisted belts, or misplaced chest clips and to update settings as children grow or clothing changes with the seasons. Treating seat adjustment as an ongoing habit helps create a more predictable travel environment over time.
Positioning Child Car Seats for Everyday Use
Choosing where a child sits is a core part of safe car seat adjustment. The rear seat is usually preferred because it increases distance from front airbags and common impact zones. Within the back row, the center position can be helpful when the seat can be firmly installed there, since it is farther from doors and side windows. In some vehicles, a side seat is safer if the belt layout or latch system allows a more secure fit and easier visual checks. Everyday routines such as school drop‑offs or carpools also matter, and many caregivers pick a spot that allows them to reach the child quickly to confirm the harness and buckles before driving.
Seat orientation and location change as children grow, so positioning is reviewed regularly as part of travel safety preparation. Infants and younger toddlers typically ride in rear‑facing seats, installed so the child faces the back of the vehicle and the seat shell supports the head, neck, and spine. When children reach the size and age ranges in the car seat manual, they may move to forward‑facing seats in the rear row, often with a tether attached when the vehicle provides one. Families may shift seats to separate siblings who distract each other or to place the child who needs the most help in the easiest‑to‑reach position. Checking that the current seating location and orientation still match the child’s height, weight, and behavior helps keep everyday trips more predictable and controlled.
| Seating Option | Key Safety Checks | Child Factors | Caregiver Considerations |
|---|---|---|---|
| Rear center seat | Secure install, stable base, no overlap with other seats | Fits rear-facing or forward-facing, matches height and weight limits | Reachable for buckle checks, works with daily routines |
| Rear side seat behind driver | Compatible belt or LATCH layout, minimal movement at belt path | Child can ride rear-facing or forward-facing without contact with front seat | Driver can glance back briefly, suitable for child needing moderate help |
| Rear side seat behind passenger | Clear access to anchors, no interference with door hardware | Appropriate for child ready to climb in with guidance | Convenient for curbside loading, easier assistance for younger child |
| Separated rear spots for siblings | Each seat independently tight, no crossing belts or tethers | Helps children who distract each other stay calmer | Reduces mid‑trip interventions, supports focused driving |
| Easiest‑to‑reach position | Allows quick harness check without leaning far | Chosen for child who needs more support or reminders | Matches common trip patterns, supports consistent pre‑drive checks |
Using Vehicle Features for Safer Child Seat Placement
Before installing a child seat, read your vehicle owner’s manual to understand how the safety features are designed to work together. Identify the lower anchors and top tether points for the LATCH system, and note which rear seating positions are approved for these anchors or for seat belt installation. Use the labels on the seat cushions and seat backs to locate anchor points, then check that your child seat is compatible with the chosen attachment method. When selecting a position, make sure the child seat base rests flat on the vehicle seat, that you can reach and tighten the connectors without obstruction, and that the seat can recline or adjust as the manufacturer recommends without pressing firmly into the front seats.
Checking Your Vehicle and Seat Before Every Trip
A quick safety check before driving helps keep car seats working as intended. Confirm the seat is still tightly installed by testing movement at the belt path and checking that it does not shift more than about an inch side to side or front to back. Look at how the seat belt or lower anchors are routed and locked, making sure nothing is twisted, loosely buckled, or resting on sharp edges or hard objects. Verify that the recline angle and seat position still match the child’s age, size, and the car seat instructions, especially if vehicle seats were recently moved. Check buckle tongues, chest clips, and adjusters to be sure they move smoothly and show no visible damage.
Environmental and trip-related checks also support safer travel. Remove heavy coats or bulky blankets before buckling, and keep toys, bags, and other loose items secured so they do not become projectiles in a sudden stop. If the vehicle has been parked in very hot or very cold weather, feel metal buckles and plastic parts before seating the child and allow the interior to air out if needed. Confirm that windows, sunshades, airbags near seating positions, and child locks are set according to vehicle and car seat guidance. A simple routine like this helps maintain safe car seat adjustment and preparation without special tools or significant extra time.
Organizing the Rear Seat to Reduce Distractions and Hazards
A tidy rear seat supports safe driving and keeps children more comfortable. Give each child a consistent spot that suits their car seat, away from items that can roll or shift. Keep only a few essentials within reach, such as a small drink or soft toy, and place them in stable storage like seatback pockets or secure organizers to reduce loose objects that might distract or move during sudden stops.
Before each trip, quickly clear the rear floor, cushions, and door pockets of unnecessary items. Place heavier bags or sports gear in the trunk or under a cargo cover instead of on the seats, and check that nothing blocks car seat buckles or anchors. On longer journeys, ask older children to keep books or devices in one pouch so you can reach seats easily for adjustments or emergencies.
Getting the Harness Fit and Seat Adjustments Right
A secure harness fit begins with choosing the correct strap height for the seat direction. In rear-facing mode, slots should be at or just below the shoulders so the straps pull the child into the seat. For forward-facing use, the harness usually needs to be at or just above the shoulders to limit forward movement. As the child grows and shoulders rise above the current slot, move the harness to a higher approved position or change to the next seat stage if the manual indicates the seat is outgrown.
Tension matters as much as strap height. After buckling, pull the harness adjuster until the straps lie flat, without twists, and you cannot pinch extra webbing at the collarbone. Position the chest clip at armpit level to help keep the shoulder straps in place. Clothing can affect how tight the harness feels, and bulky coats or thick padding may reduce how well the harness holds the body, so many caregivers check the fit before each trip.
Seat recline and overall positioning support the child’s head, neck, and airway while the harness provides restraint. Rear-facing seats usually have a marked recline range to help prevent the head from falling forward, and these markings and age guidance in the manual should be followed. For forward-facing use, the seat should be upright enough that the child sits back against the shell, with the harness crossing the stronger areas of the shoulders and chest. Regularly checking movement at the belt path and making small adjustments as the child grows helps keep the fit appropriate over time.
Q&A
-
What are the basics of safe car seat adjustment for daily driving?
Seat children in the rear in an age‑appropriate seat, installed tightly with LATCH or a seat belt. Adults should sit upright, reach pedals without stretching, and keep the shoulder belt across the chest, not the neck or face. -
How do I pick a safe spot for a child seat in my car?
Use the rear center if the vehicle and child seat allow a secure install. If not, choose a rear side seat where the belt or anchors match the manual and you can easily see and check the harness each time. -
Which safety checks should I do before driving with a child seat?
Push at the belt path so the seat moves less than an inch, confirm belts or connectors are snug and untwisted, and look at recline indicators and hardware to be sure nothing is loose, cracked, or missing. -
How can I keep the rear seat organized without adding risks?
Limit items to soft essentials, store them in seatback pockets or secured organizers, and avoid loose heavy, sharp, or hard objects that could become projectiles or distract the driver during sudden maneuvers. -
How do I quickly check if my child’s harness fits correctly?
For rear‑facing, place straps at or just below the shoulders; for forward‑facing, at or just above. Tighten so you cannot pinch the webbing at the collarbone and position the chest clip at armpit level.